A while ago somebody was interested in how stem inserts and end caps are done. Seeing that at that stage I was busy with a pipe that was going to get a shank ring, I thought I might as well put a couple of photos together and show how I do it.
In this instance, the pipe was shaped first and the bowl, airway and mortise drilled thereafter, but it is also possible to do it the conventional way (by drilling and then shaping). The particular stummel has been shaped in rough on a 24 grit disc. First, with the pipe fitted onto a pin gauge, a small tenon is turned on the shank, slightly bigger than the mortise size. I like to have only briar and ebonite (or in some instances, acrylic) in contact with the smoke channel, although some other makers prefer not to see any briar on the shank face when making an end cap.

Then I'll face both sides of the material that is going to be used as end cap to the thickness wanted. This is then drilled to about a one millimeter depth with a forstner bit that is slightly smaller than the height of the shank when seen from the side. This have the advantage that, especially when using wood, a little bit of warping will not have any effect on the fit of the stem. Thereafter I will use a bit with the same diameter as the tenon that was turned on the stummel, to drill through the ring. For now, this ring will be kept to the side.
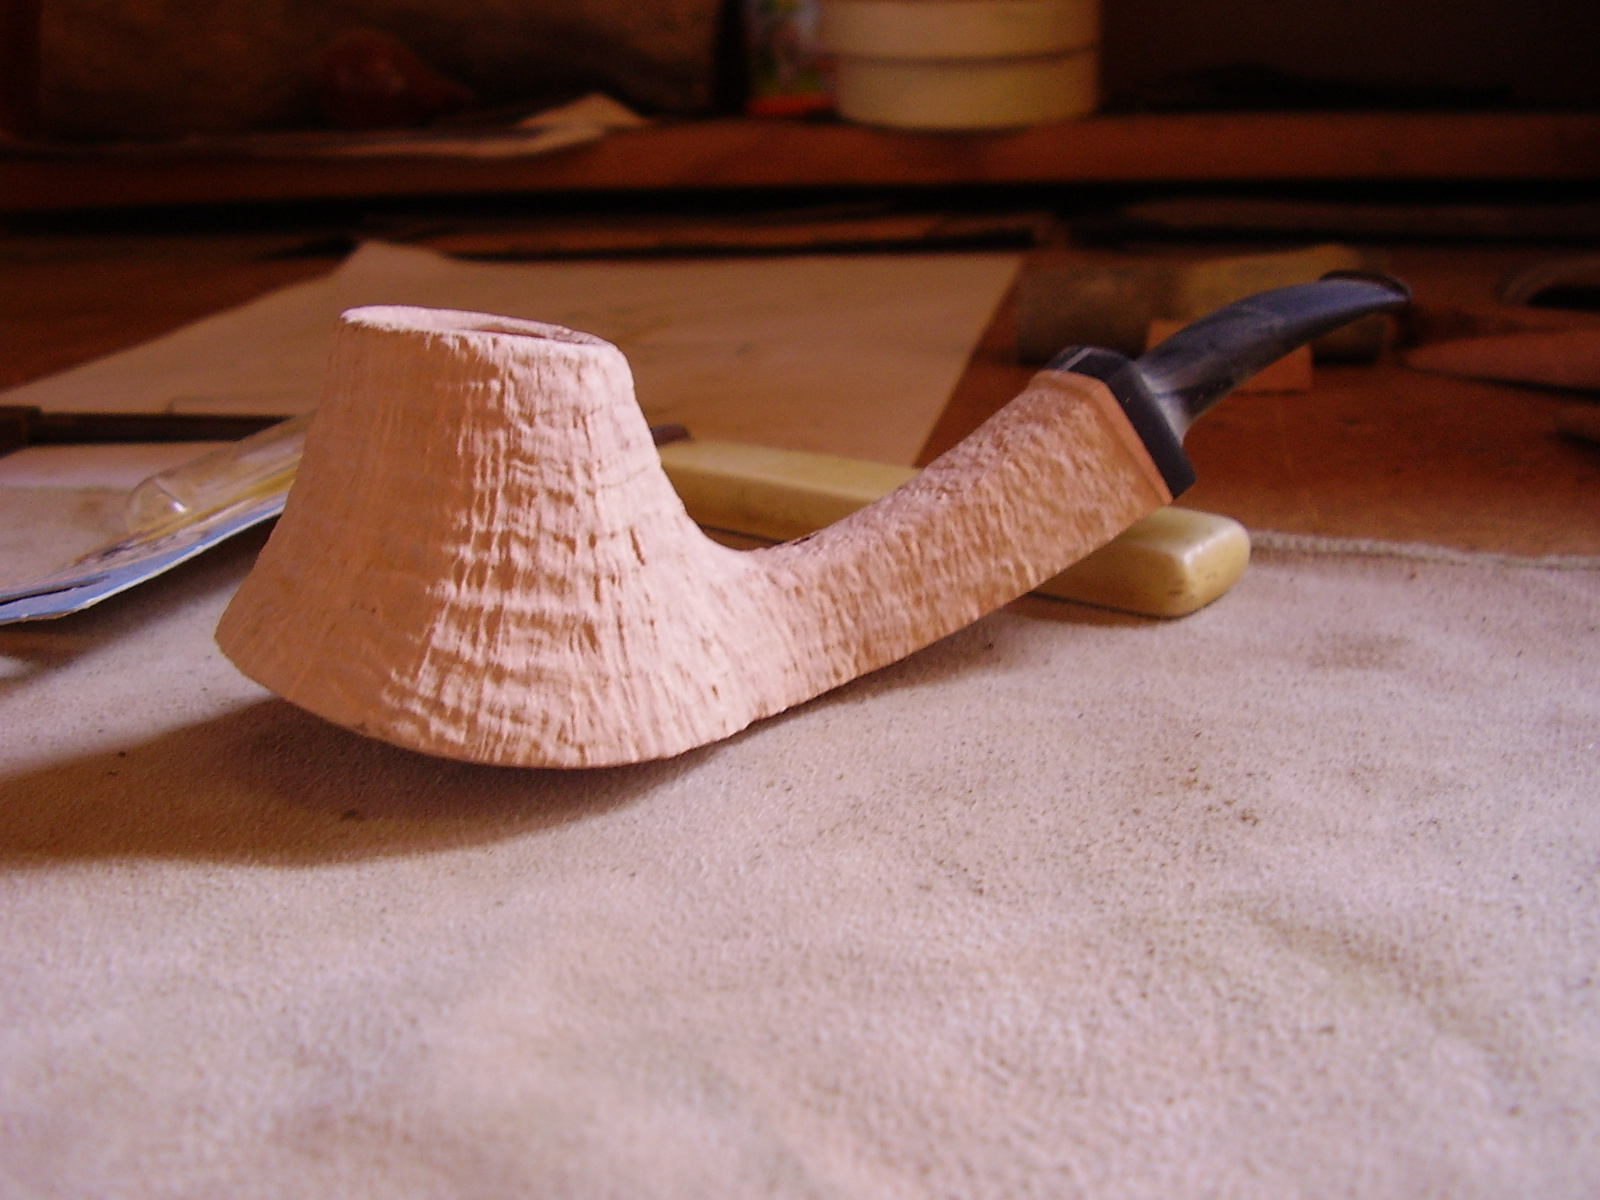
An off-cut piece of briar is then faced and drilled with the same bit and with a tiny bit of CA glue on the tenon, glued to the shank.
The reason for using this off-cut is to ensure that the shank lines are kept true, without the chance of rounding the shank edge when sanding through the grits. I finalize the shape on the discsander with 60 and 100 grit discs and then go onto sanding by hand. The off cut will stay on until the pipe has been sanded and stained to completion, with only buffing and polish still to come.
Now the off cut piece of briar can be removed. This I do by very carefully using a small vice to chuck the off cut only and then with a sharp quick twist of the stummel, get the off cut to come loose.
The secret is to use only enough CA glue to keep the piece in place, but not too much so that you'll struggle to get it off or worse, break the shank!
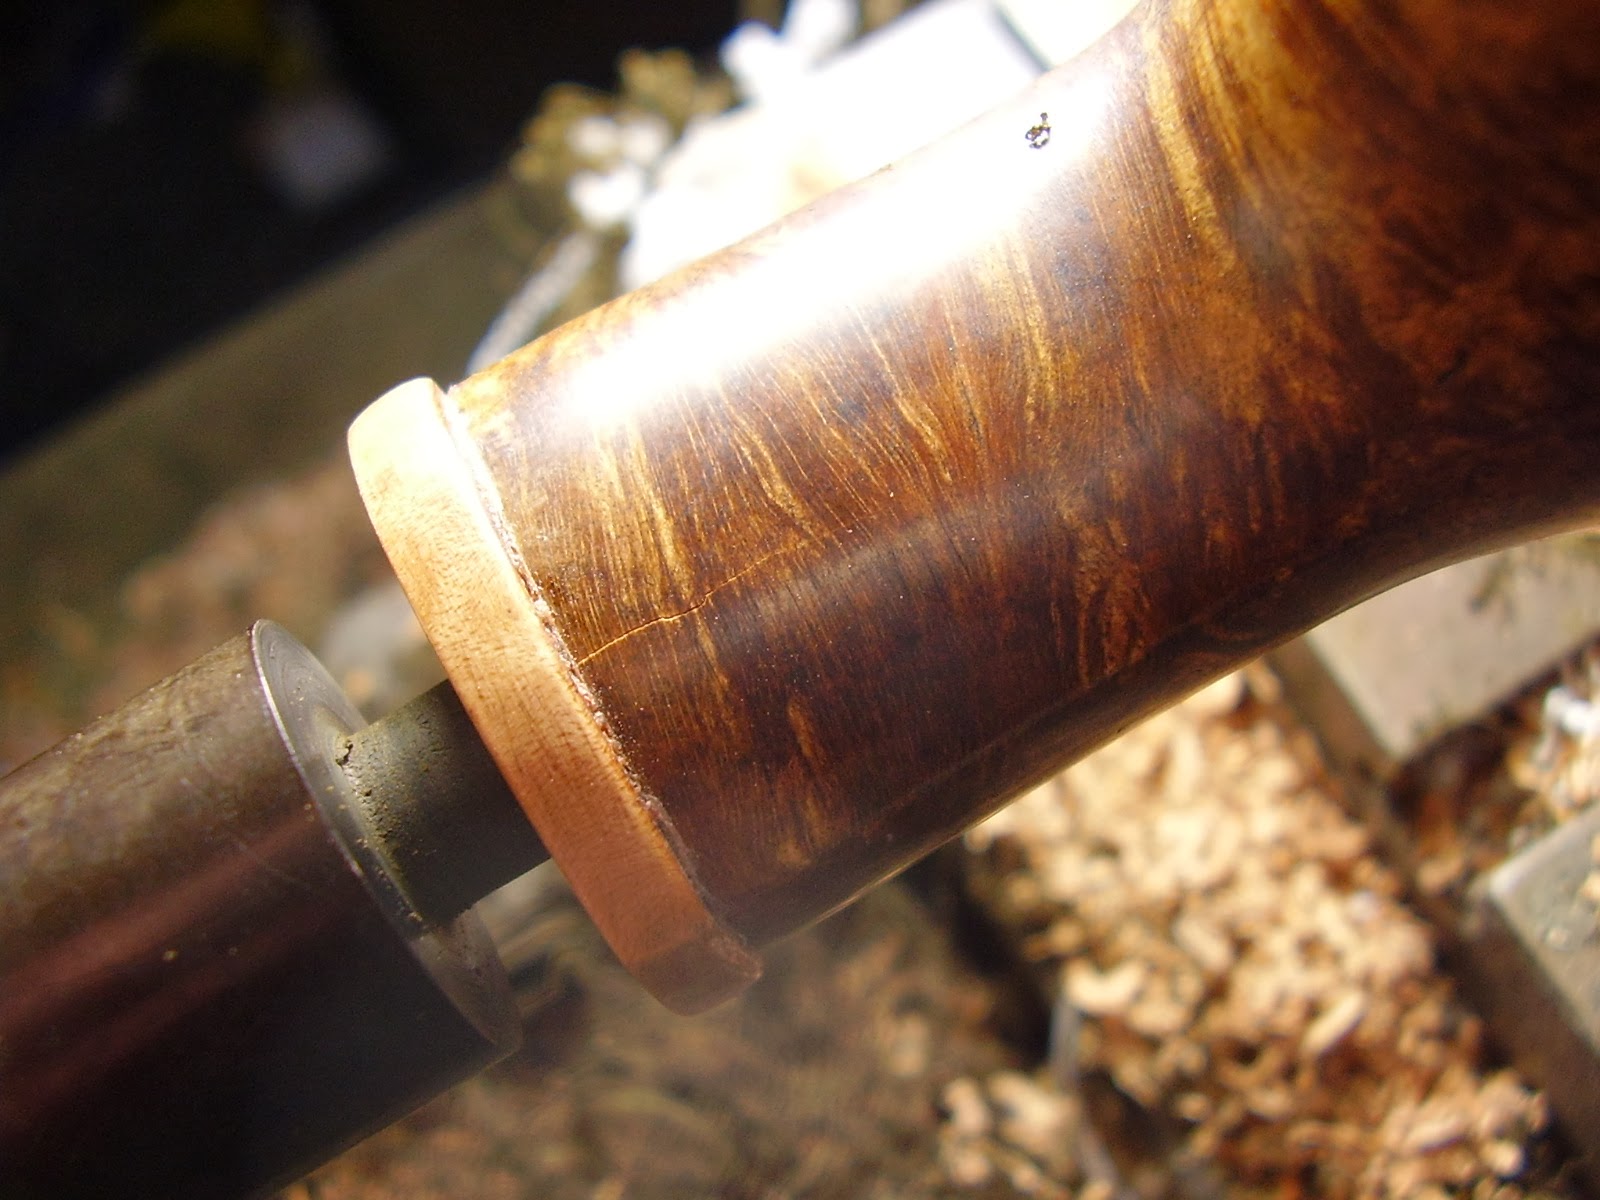
Now the shank ring is dry fittted into place and shaped to the desired size and with the desired radius. When I'm happy that it is as I want it to be, it is sanded to 400 or 600 grit (depending on material).
The next step is to epoxy it into place. A generous amount of epoxy is put on both the briar shank face and the briar tenon, the end cap is slipped over and held in place for a minute until adhesion starts. All the excess glue will pop out from between the shank face and the shank ring, but do not worry and do not touch or wipe this. Take the backside of a match and every now and then stir a bit though the epoxy that hasn't been used. In a couple of minutes you'll notice that this becomes harder when it starts to set. That is the window of opportunity you need. Take a toothpick and carefully start removing the excess epoxy. If you're timing is right, it will peel off easily. There will be no glue marks left on the stummel or shank ring and no visible glue line between the two.
Normally I will start on the stem now, until completed, then stamp the pipe and polish and wax.