Welcome!

Welcome to my world of pipes. On these pages you will see some of what goes on in my workshop. A bit of work-in-progress, mess-ups (they do happen!) and also some other pipe-related posts.
I love talking about and discussing pipes, so feel free to contact me at charl.chillfactor@gmail.com.
Should you wish to have a look at my pipes, please drop in at my website (http://goussardpipes.com/).


March 13, 2012

Stemwork Part 2 - Rough shaping

Last time we finished with the drilling done and the airway polished. This time the post is about rough shaping the stem. Again, I do not propose this to be the "right" way, I'm merely showing what works for me!
In the first step, I take the stem to a sanding disc, where I'll start with 60 grit and get the taper (i.e. on a tapered stem) and rough shape going. This will be followed by a 220 grit disc.
How do you like that button?
That was the easy bit. Now the elbow grease starts. First I use a very rough file to get the shape more defined. I'll also do a rough-over of the stem/shank joint, to get it smoothed. And I'll also work up the shank towards the bowl a bit.

Then I move onto the bit side, thinning the bite down, while also keeping in mind that the top and bottom of the taper have to form a straight line.

File work, lots of file work and then filing, filing and some more filing!

Next the button will be thinned down. In this step it is important to use an edge-safe file, of course. It's happened quite often that I have the file the wrong way around! So take care and double-check yourself.

When everything is more or less roughly the way I would like the end product to be, I'll have a look at the thickness of the bit. Sanding and final finishing will still remove a couple of microns. I normally at this stage like to have the bit thickness by at least 4mm, but preferably a tad less.


I know these couple of photos and bit of text only gives you the rough idea, so please feel free to contact me should there be any questions.

Next we will be looking at final sanding and finishing.


March 5, 2012

Stemwork Part 1 - drilling

I realise that there are a lot of "how-to" regarding pipe making on the web, but nevertheless thought that some people might find it interesting to see how I make a stem. Let me first off say that I do not propose that this is the "right" way. As in most cases regarding pipe making, this is merely the way that works for me and the way that worked with this specific pipe.
Right, that off my chest, let's start.
I cut a piece of ebonite to the specific length that I want. As I make integral tenons, this will be the eventual stem length plus tenon. Normally I would first round one half, flip the ebonite around and then round the other half, but as the diameter was very close to the eventual diameter needed, I left this step aside.
Its normally quite an important step actually, as most pipemakers would know that a round rod is most often not round at all!
First off, the blank is faced. I then take a brad point 4mm bit that is pushed as deep as possible into the jacobs chuck, to start the hole. This is done to assure that the flex of the bit is minimized as much as possible so that the hole will be centered.
This "starter" hole is then followed by a tapered bit. The depth of this cut will finish 10-15mm before where the bit eventually will be.


Next is the turning of the tenon. The mortise depth on the stummel is measured and transferred onto the rod. The tenon is turned to within a hair width of the required diameter. From here on the fit is tried after every pass, as little by little is taken off. When the fit is satisfactory, the tenon is bevelled and the air hole countersunk. Last of all the tenon is polished.


One last step to be done on the lathe: the rod is flipped over and the last remaining bit of the tapered airway drilled through with an 1.5mm bit.


The cutting of the slot is next. This I do with a dremel cutting bit (the specific number I unfortunately can't remember!) in a drill press. The ebonite is held flat in a drillpress vice.


Now the bit is widened into a funnel shape. This is done by using the 1.5mm bit and basically "smearing" it, working it back and forth, using the cut to widen the slot.


Next up the slot is cleaned up with needle files, with the final step to this part of the process, polishing the inside of the airway with a pipecleaner.


Keep an eye open for Part 2, which will be about the shaping of the stem.


February 14, 2012

Freehand drilling - Part 2

Some of you guys might remember that I had a disastrous previous episode with freehand drilling. This is my second attempt at it, although somewhat of a wuzz-try I admit!
Here is how I did it this time around:


First I drew out all the lines for air hole, mortise and tobacco chamber. Then small off cut pieces of briar was glued into place as in the above photo. These were used as support for a live center in the tail stock of the lathe, with the bit chucked into the headstock.


With freehand drilling, the drilling procedure works a bit different for me than with normal drilling. First I drill the mortise, as normal.


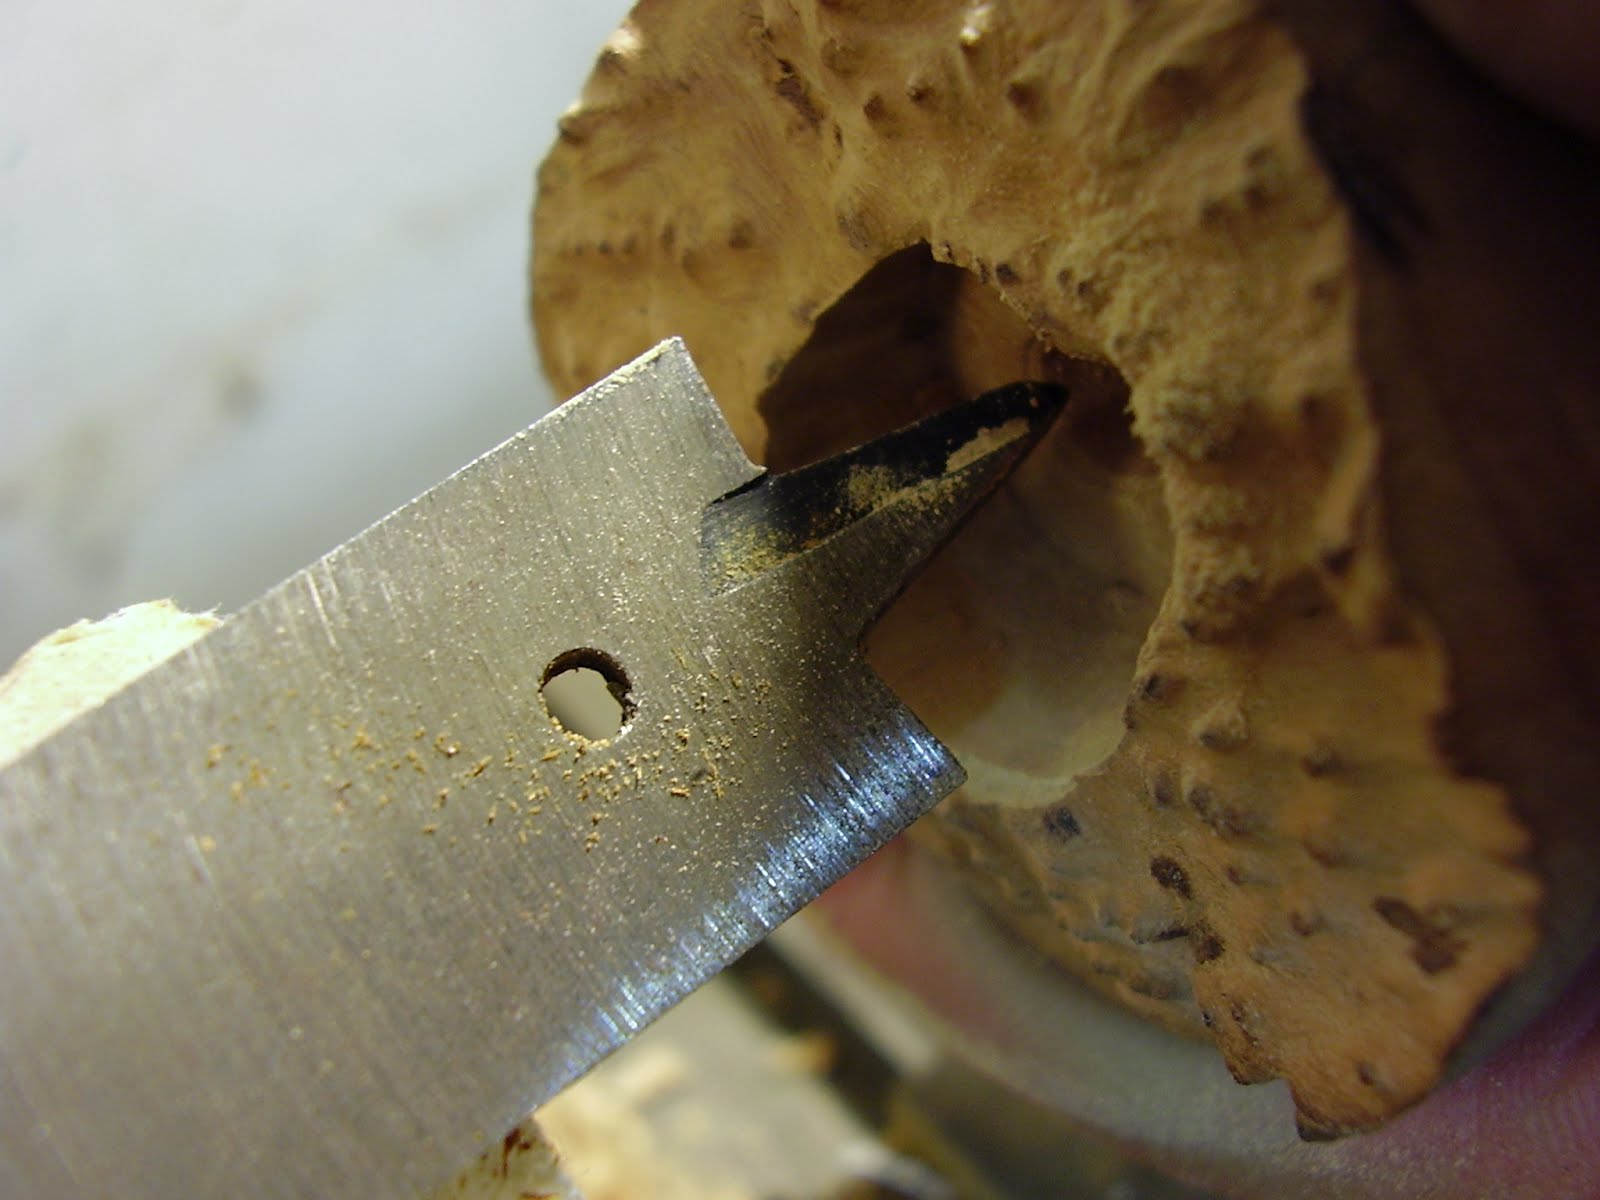
But then I immediately went to drilling the chamber, instead of the air hole. The above photo shows where I am using a normal spade bit to pilot the hole.


Here you can see how the tail stock is used as support to feed the stummel onto the bit. After the initial cut with normal spade bit, a chamber bit is used to finish the hole.


The final step was to drill the air hole. This time the drilling was done real "freehand".


PS - Dead center this time around.


PSS - No whisky needed to drown my sorrows, although a celebratory one was consumed!


January 30, 2012

On the bench

The beginning of the year so far has not been much fruitful regarding pipe making.
First off, my holiday went wrong. Ask me what my ultimate holiday would be, I would most definitely say that it would be undisturbed and unlimited time in the shop. The two weeks of holiday that I had since just before Christmas, was not really holiday at all. It was spend on doing those things that's been dragging on for way too long, but just had to be done. Yip, you guessed it: painting, varnishing, gardening, etc.
Then, as if that was not enough, we had visitors for 3 weeks.
So, after all that wasted time, I eventually came up with these 3 pipes on the bench.
The little saucer with bamboo insert started life off as a bulldog that surprised me with awful fissures and cracks on the rim. It's been lying on the bench for a couple of months, until I picked it up and decided to play around with it and a sanding disc. I'm not really sure which way I'm going with the stem yet, but I have a couple of ideas.
The rough shaped stummel on the right is destined to be my 2nd try at shape-first, then drilling. Hopefully you'll see a glorious post about this. If you do not, do not ask.
The pipe in the middle started off with a long shank and the idea to give it a short saddle bit, with maybe a bit of green acrylic thrown in, to keep with the flowery theme. But alas, briar is a fickle friend (or sometimes fiend) and the shank broke. I'm very happy with the result so far, though. Stamping, polish and wax still to come and this one will be ready.


November 18, 2011

Workshop

My wife took some photos of me in the shop a while ago and I thought I'd share them with you.

Here's me in the workshop. Luckily the photo is quite small and in black and white, else you would have been able to see that the pairof jeans that I'm wearing is torn to pieces!

My trusty old lathe. All the additional tooling and modifications is worth much more than what I paid for it. It doesn't happen often that I get a real bargain. This was definitely it.


And last but not least: my workshop companions. Dory the garage cat, Tosca the border collie and Diesel the Husky.


October 30, 2011

Of files and rasps


Tonight when finishing up in the shop, I suddenly realised that in front of me, half the table has been taken up with files. No wonder, as any pipemaker will be able to tell you!


I for one, can't walk past a file without thinking where it'll be very usable. All shapes and sizes, big to small, flat, round, half round, triangular. I need them all.


Well, sooner or later I will!


The first photo are the ones that I rarely use. Among them the rasps. For pipe making rasps are really too hardcore in my personal opinion. The triangular files I basically use for intricate stem work or on bents to get into tight corners.


The files on the 2nd photo, are my everyday workhorses.


Bottom one first. This file is called a "farmers friend". Might also be called Charl's friend. It gives a smooth cut, removes stock quickly and have safe edges on both sides. Wonderful for stem work.


Second from the bottom is the monster. This file is huge and actually way too long and unwieldy for pipe making. It belonged to my grandfather. But it is indispensable when making tapered stems. The taper from tenon to button will be straight as an arrow, that I can promise you.


The third one is called a chainsaw file. This round file I use on shank/bowl transitions and also on the more "fancy" stems. It also is good to have when sanding, I've found. With a piece of sandpaper turned around it, it'll get into weird and wonderful corners. Indispensable.


Next up is another big and cumbersome beast. Got this one for a bargain (just can't walk past a bargain, now, can I?) at a 2nd hand shop. The width allows for nice wide flat surfaces. Have to be careful when filing though, because of the sharp edges. I mainly use it for rough work.


Number four is a small square file, with very fine cut and safe edge on only one side. This file is used for finishing work around the button. Especially just in front of the button and then also the surface perpendicular to the bowl, the "vertical walls" on the stummel side.


Last but not least, is the file I probably use the most. It was bought as part of a set of cheapies. And what a good deal its been! This file removes stock quite quickly. Originally it didn't have any safe edges, but this was remedied on the bench grinder. It is used on the stummel, around the shank/bowl transition, and then also to get rid of those little bumps and ridges that always appear. For stem work it is amazing. It can be used on saddle stems, tapered stems, on the button, etc. The list goes on and on.


September 10, 2011

On the bench

At the moment I am busy with these 3 pipes. A cutty, a straight rhodesian and acorn.
The shank of the cutty still have to be thinned down towards the stem and will be sandblasted and stained. I love the flowing lines of a cutty, as well as (of course) Zulu shapes. It is quite sad though that most pipesmokers ignore them. The forward canted bowl is off putting to many people and there seem to be the opinion that they would not smoke well. In my humble opinion the opposite is actually true. The forward canted bowl allows for the airhole to finish right in the bottom of the bowl, allowing for a great draw. And there should also be no worries about the tobacco and ash falling out! Do yourself a favour and have a look at them next time you have a bout of PAD.
I've always been fascinated by rhodesians, but for some reason never made any. I don't know if it is a South African thing, but almost all of the old pipesmokers that I grew up with, had either a bulldog or rhodesian in their collection. Most often, rhodesian. This one is a straight, stubby one with the bowl canted forward ever so slightly. The grain is looking good and it will probably end up as a smooth.
I have made a couple of acorn shaped pipes before. This is quite a challenging shape, but also allows for a lot of flexibility. The acorn can be fat and stubby, slim and sharp, or anything in between. The same with the shank. You can have it curved, with reverse taper etc. No wonder pipemakers love this type of pipe. This one is destined to become blasted.