Welcome!

Welcome to my world of pipes. On these pages you will see some of what goes on in my workshop. A bit of work-in-progress, mess-ups (they do happen!) and also some other pipe-related posts.
I love talking about and discussing pipes, so feel free to contact me at charl.chillfactor@gmail.com.
Should you wish to have a look at my pipes, please drop in at my website (http://goussardpipes.com/).


September 4, 2014

War of the Briar

This past week I had a stummel in the lathe with everything drilled and the shank shaped, just the bowl still to be turned. I was a bit hasty with the gouge and this was the result!
The smaller piece hit me in the stomach, with the larger flying past my left ear.
Who said pipemaking is for sissies?


June 24, 2014

Endcap woes

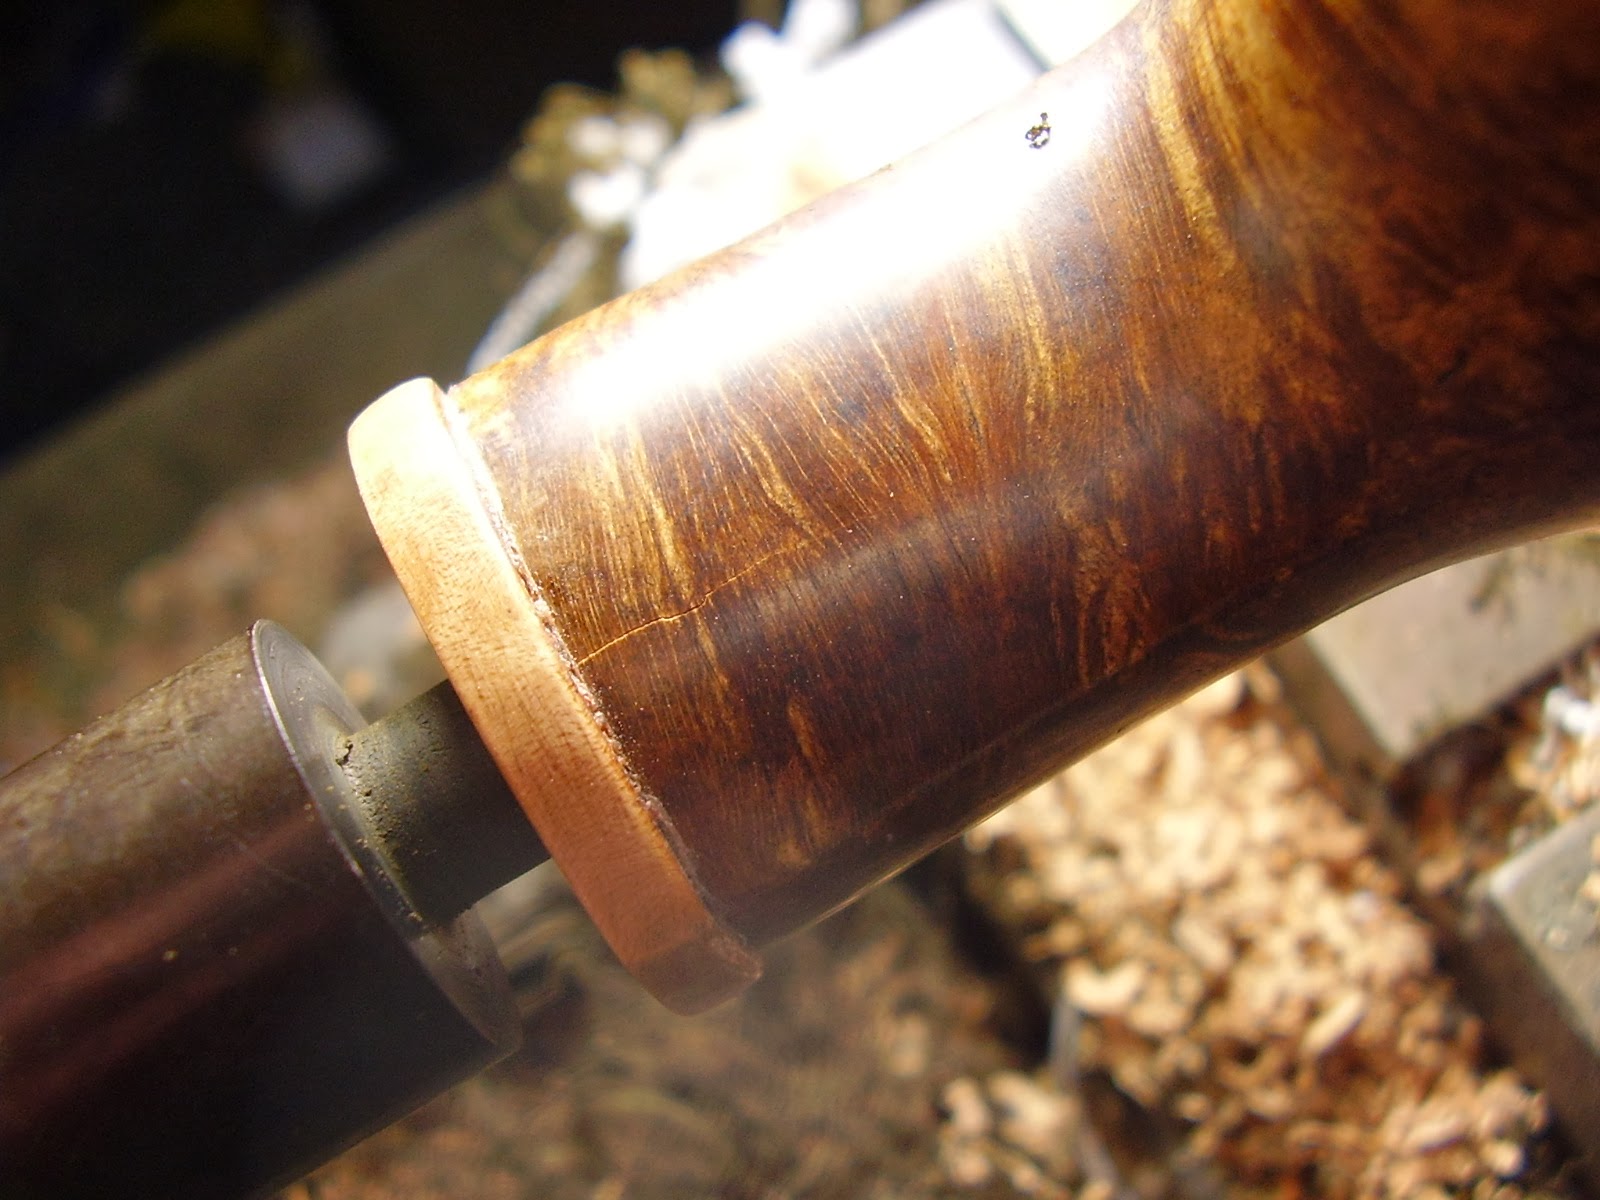
I was busy with a pipe that I was going to fit an endcap to, this afternoon, when this happened...
 Normally I turn a little tenon on the shank when I'm planning on using an endcap, then fit a scrap piece of briar over with a spot of CA glue to keep it in place while sanding. This is done so that I end up with smooth lines towards the end of the shank, instead of rounding it over, which is bound to happen when doing it without.
Under normal circumstances (today I use the term lightly), I put the scrap end into a vice and with a gentle but firm twist, break the unwanted piece off. If you look closely, you'll see part of the briar tenon on the left in the scrap piece and the broken bit on the shank end of the stummel. A bit of the CA glue must have gotten where it was not supposed to go, onto the tenon and not just the face.

June 2, 2014

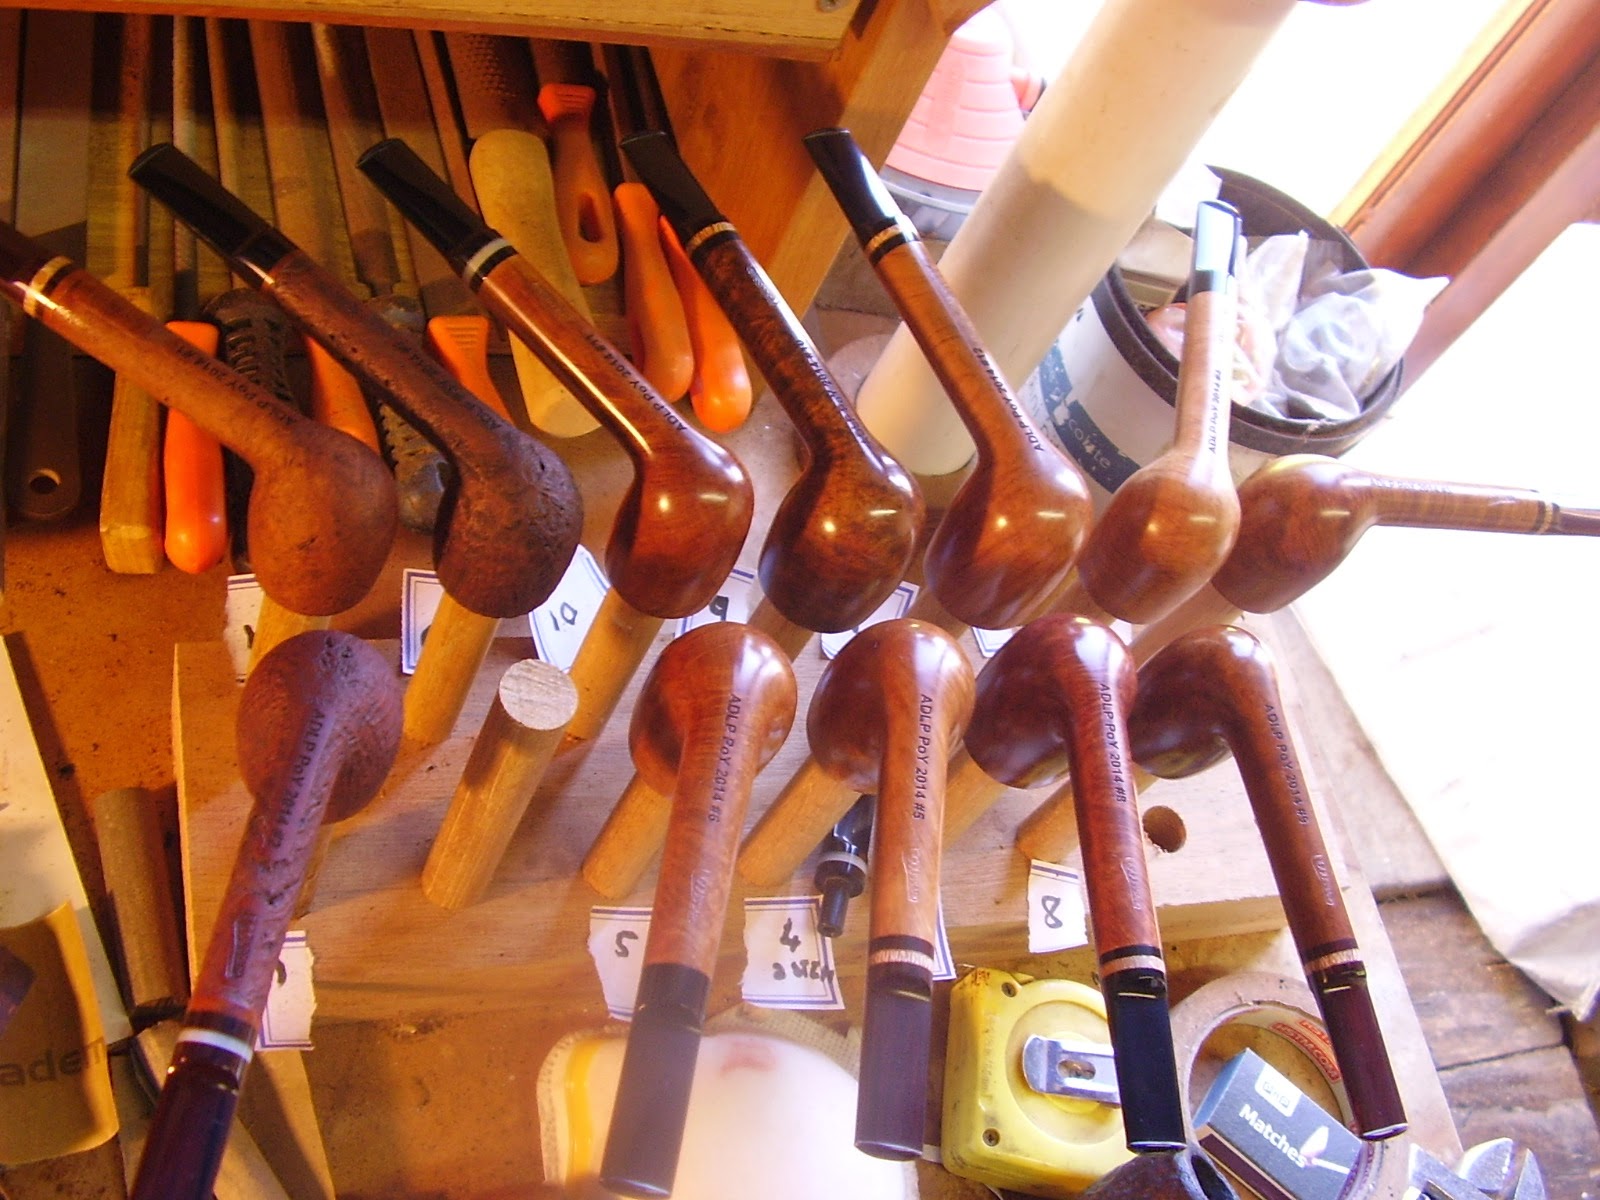
Autour de la Pipe PoY 2014

I've just recently finished the Autour de la Pipe Pipe of the Year for 2014 and thought I'd share some very random photos. Random, because most of the time I forgot!
This photo above, is where I finished the lathe work on the stummels. All stummels have been drilled with mortise, airway and bowl. The top of the bowl and most of the shank has also been turned and sanded as much as possible. After this, I went to the sanding disc.
 Here, I've started with fitting stems and shaping them. Oh, and in the foreground a prerequisite for pipemaking: coffee!
 This blast gave me a big surprise. The wood was overall unremarkable, with enough flaws to ensure a blast. Just goes to show that however and whatever you think you see on the outside of a stummel or block of briar, is, well, just a wild guess! And boy was I wrong with this one!
 The same pipe with ADLP PoY 2014 that was laser engraved on it, as were the rest.
This pipe received some contrast staining that came out pretty decent. All the pipes were made from over 50 year old Algerian blocks and in those days, most cuts of briar were just to maximise quantity, most definitely not quality of grain. Hence most blocks had very irregular grain.
Getting closer to completion...
A view from the top of the completed lot.
 And a sideview, just before boxing and a trip to the Post Office.


April 4, 2014

Real blowfish?

Tonight I have this one on the bench. In the pipemaking world nowadays, anything with a panel on the side and some kind of sharp edge somewhere, is called a blowfish. Most of them done with cross cut ebauchons. Personally, the real blowfish is similar to what I've tried here. Plateaux, straight grain and an edge from the top of the bowl straight through to the stem, emphasising the difference between the straight grain on the side and birdseye on the bottom.
This is my attempt. If you want to have a look at the finished pipe, it should be on my website in the coming week.

March 26, 2014

On the bench

Here are a couple of pipes that I'm busy with at the moment.

At the back is a little chocolate volcano with a wild olive stem ring. A little pocket rocket!
The pipe in the middle is an acorn bamboo with really gorgeous grain. The growth rings are absolutely stunning, making me really tempted to blast. But not a single little pinprick flaw shows on this one. It is really big though, so it is not going to work for clenchers.
The one in the front is a stumpy chubby bent from cross cut ebauchon. This is my type of pipe. It is short enough to fit into a pocket, with a big enough bowl to last me quite a while.
All  three should be on the website in a couple of days, if you want to see some finished photos.

March 20, 2014

Somebody is still thinking about pipesmokers

I saw this while visiting Lithuania in January. Pretty cool!


February 24, 2014

A coming of age

In my first year at varsity, my room mate smoked. I did not. In fact, I hated the smell of smoke. There was a constant moaning and groaning from my side regarding his smoking in the room.
One afternoon, we were chatting along, when I told him that I will never smoke cigarettes (ha!), because it stinks. The only smoking I might do, I declared, might be a pipe, because it least that smells nice!
So off my enterprising friend Andreas went and he got himself a pipe, thinking that he will then be able to smoke in the room without any complaints. It wasn't long before I tried a couple of puffs and the infatuation started!
My dear friend came visiting over the weekend and much too my surprise, he pulled The Pipe out! The very first one that he bought and we both smoked.
It is a no name basket pipe, of course stamped "real briar" (and that only) with crackled and pitted varnish finish. The bowl looks like crap, the tenon have paper turned around it to keep it in the mortise and the stem has been superglued where it broke in two.
Does it have any monetary value? No way! But that little crappy pipe is worth much more to me than my whole collection, I'll give 10 Goussard Pipes for that pipe to keep ownership of either me or my friend.
And the best of all?
It was exactly 21 years ago we met and started smoking that pipe together, we're still doing it and we probably will be doing it still in another 21 years time!

February 10, 2014

First of the Lithuanian Specials

Here are the first two of the lot of  pipes that I started while visiting the in-laws in Lithuania.

The bottom one is in the Scoop fashion, with the top one a chubby apple. On the apple I tried a new contrast staining technique, which I'm so far quite impressed with. The grain of course also helped!
They just need to be waxed and polished and then they'll be ready for school!

January 8, 2014

Pipemaking in Lithuania

If you're a pipemaker, you'll find a way to make pipes anywhere. Luckily for me, my father in law is a carpenter by trade, which helps! We are in Lithuania visiting the in-laws for the holidays and I wanted to be able to make some dust while being here.
 I was very surprised (and happy!) to find this machine here in his shop. Its function is actually for mortising. The table you see in the front can move up and down, forward and back and from left to right.
 The three jaw chuck is of course very convenient! With the table moved forward, I can use it for sanding with a disc. I've also tried to drill both stummels and stems with it, just to see, but the speed is unfortunately way too high. There is no specs on the motor, but I reckon rpm must be in the 3000 range. Luckily, like in most woodwork shops, there also is a drillpress, with which I can do the drilling.
 This is a couple of bits and bobs that I brought along. Different sizes and types of rodstock, bits, bamboo, sanding discs, a file or two and of course some blocks.
And here are the first 2 babies that I got going.

December 2, 2013

How I do a shank ring

A while ago somebody was interested in how stem inserts and end caps are done. Seeing that at that stage I was busy with a pipe that was going to get a shank ring, I thought I might as well put a couple of photos together and show how I do it.
 In this instance, the pipe was shaped first and the bowl, airway and mortise drilled thereafter, but it is also possible to do it the conventional way (by drilling and then shaping). The particular stummel has been shaped in rough on a 24 grit disc. First, with the pipe fitted onto a pin gauge, a small tenon is turned on the shank, slightly bigger than the mortise size. I like to have only briar and ebonite (or in some instances, acrylic) in contact with the smoke channel, although some other makers prefer not to see any briar on the shank face when making an end cap.
 Then I'll face both sides of the material that is going to be used as end cap to the thickness wanted. This is then drilled to about a one millimeter depth with a forstner bit that is slightly smaller than the height of the shank when seen from the side. This have the advantage that, especially when using wood, a little bit of warping will not have any effect on the fit of the stem. Thereafter I will use a bit with the  same diameter as the tenon that was turned on the stummel, to drill through the ring. For now, this ring will be kept to the side.
An off-cut piece of briar is then faced and drilled with the same bit and with a tiny bit of CA glue on the tenon, glued to the shank.
 The reason for using this off-cut is to ensure that the shank lines are kept true, without the chance of rounding the shank edge when sanding through the grits. I finalize the shape on the discsander with 60 and 100 grit discs and then go onto sanding by hand. The off cut will stay on until the pipe has been sanded and stained to completion, with only buffing and polish still to come.
 Now the off cut piece of briar can be removed. This I do by very carefully using a small vice to chuck the off cut only and then with a sharp quick twist of the stummel, get the off cut to come loose.
The secret is to use only enough CA glue to keep the piece in place, but not too much so that you'll struggle to get it off or worse, break the shank!
 Now the shank ring is dry fittted into place and shaped to the desired size and with the desired radius. When I'm happy that it is as I want it to be, it is sanded to 400 or 600 grit (depending on material).
The next step is to epoxy it into place. A generous amount of epoxy is put on both the briar shank face and the briar tenon, the end cap is slipped over and held in place for a minute until adhesion starts. All the excess glue will pop out from between the shank face and the shank ring, but do not worry and do not touch or wipe this. Take the backside of a match and every now and then stir a bit though the epoxy that hasn't been used. In a couple of minutes you'll notice that this becomes harder when it starts to set. That is the window of opportunity you need. Take a toothpick and carefully start removing the excess epoxy. If you're timing is right, it will peel off easily. There will be no glue marks left on the stummel or shank ring and no visible glue line between the two.
Normally I will start on the stem now, until completed, then stamp the pipe and polish and wax.



November 17, 2013

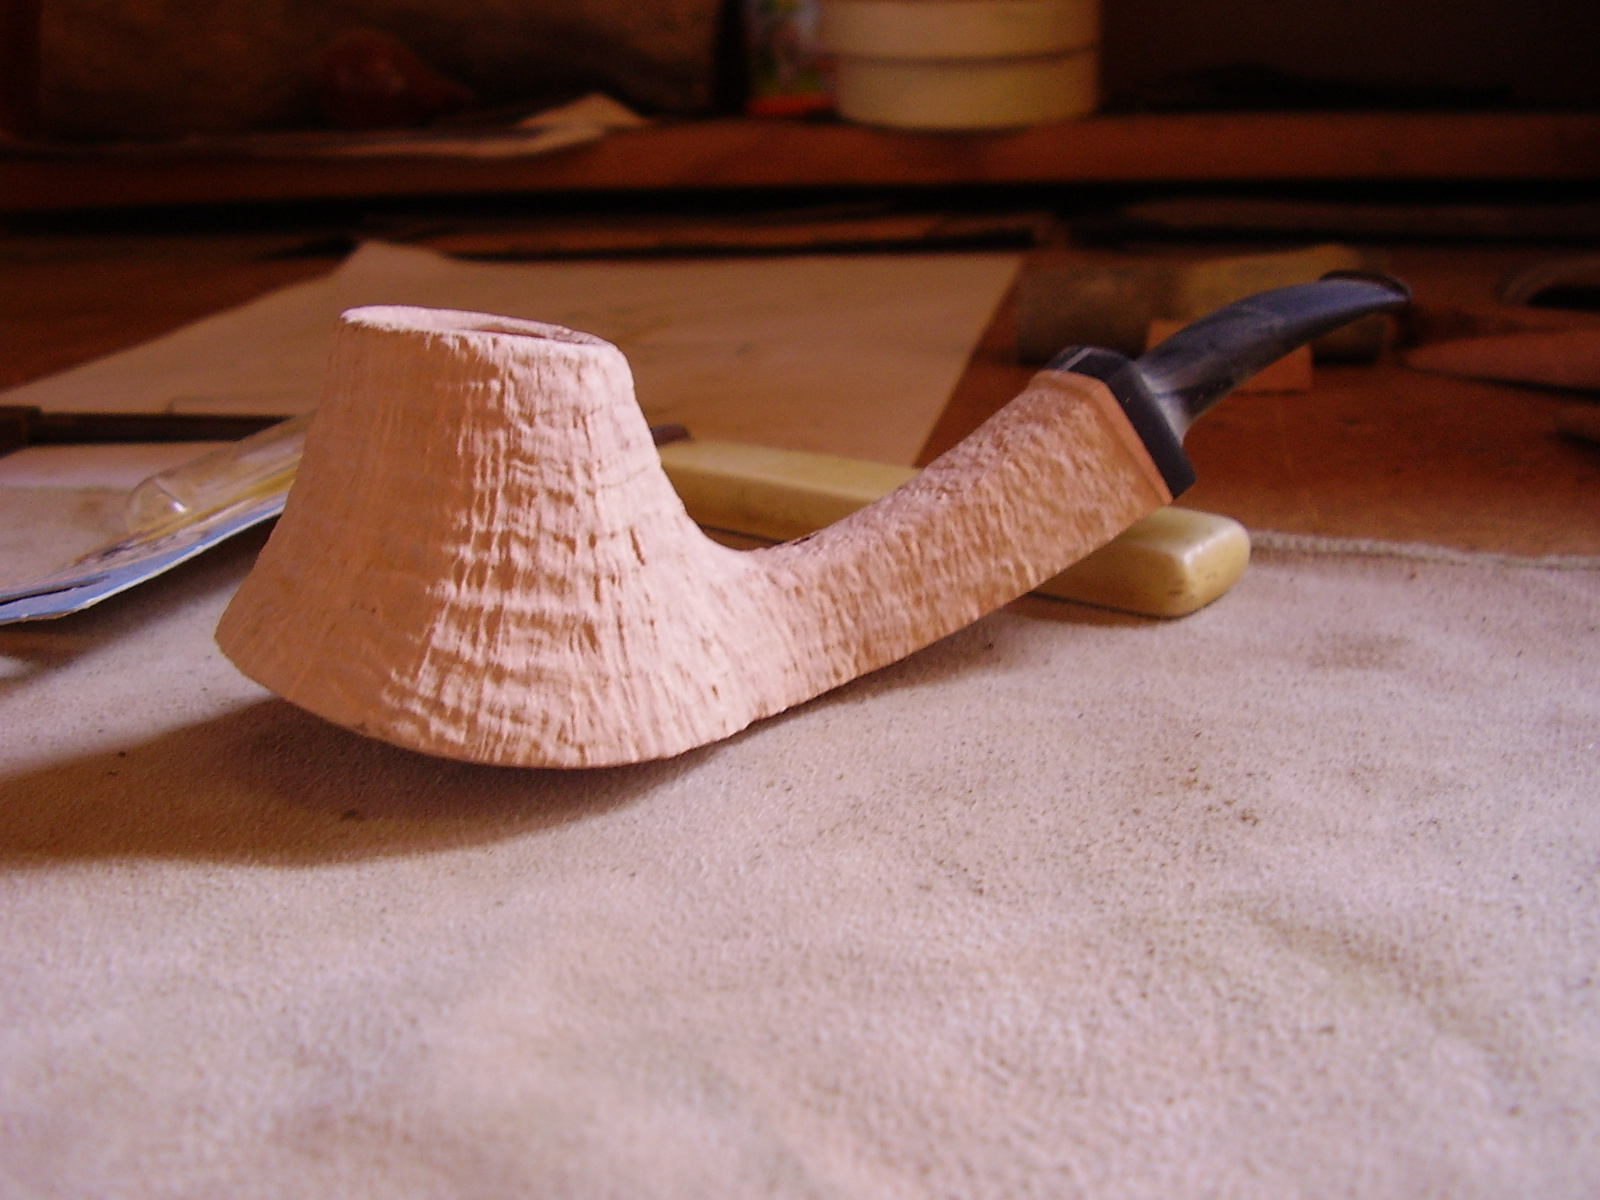
A recent blast

This is a blast that I finished last week and I'm pretty stoked with how it turned out.
Here is the pipe just after blasting:
 And here is the finished pipe:
 Isn't briar such a wonderful  amazing wood to be able to work with?

October 18, 2013

A week ago..

This is a week ago..
And it still looks the same! I just hate it when work gets in the way of pipemaking!

October 4, 2013

Vladivostok!

I was working on this beauty this morning. With the stummel basically completed (just wax and polish to follow), I started on the stem.
 Being a bit impatient, I forced the tenon into the mortise and heard the faintest sound of wood going "crack".
We learn from our mistakes, I suppose...

September 19, 2013

It's Christmas!

A few times a year, I become like a little boy before Christmas. I check the post box every day, the excitement starts building. During the second week, I start checking twice a day. A parcel from the Mediterranean normally take 2 to 3 weeks. With every sound I hear from the street, I get up to go see if it is not the postman.
 Then I start getting anxious. Can it be that it got lost somewhere? Maybe the plane carrying the parcel fell into the sea? Maybe customs opened it and thought that it is firewood?
 Then one day, when I least expect it, there it is! The important little piece of paper from the Post office, with my name on it and saying that I have a parcel that I need to come collect.
 All plans for the day jump out of the window, pushed and shoved away. Nothing is more important now! With my heart racing, the keys get grabbed from the table and I get into the pick-up, tyres screeching around the corners. It's here, it's here!
 If it weren't for my ears, my smile would meet at the back of my head! I bounce into the Post Office, get the parcel and race back home. Pour myself a coffee, savour the moment and then opens the box to see what my wonderful friend have thrown my way this time!
I can do without my birthday. I can even do without Christmas. You can kill my dog, steal my food, crash into my car. But do not ever attempt to take this away from me!

August 16, 2013

Birdseye

I have a commissioned elephant's foot that I am working on at the moment. When push comes to shove, I really prefer straight grain or flame grain, but this birdseye is really something, hey?
 It is such a pleasure working with briar, so many possibilities with this type of grain. Just imagine all pipes being made from, well, for example, meranti or oak? Boring.

July 8, 2013

Sometimes you win, sometimes you lose

I had this volcano that needed to be blasted. Some beautiful grain made me anxious to see what the blast would  look like.
 The blast turned out stunning.
 But the airway showing up was not..
 I knew the airway was quite close to the top of the shank, but didn't think it was this close!
 Wouldn't you cry?


July 3, 2013

On the bench

I came into the shop the other day, had one look at the bench and promptly decided that a picture needs to be taken of this mess! Half a stummel and a block of briar is the only indication that this is the bench of a pipemaker.
 But lets move on to the pipes that I currently am busy with. These pipes have been cut from the same block of briar.
 The volcano was shaped first and then drilled.  The briar have beautiful grain, but a couple of flaws, very small but in strategic places, will necessitate sandblasting. I can't wait to see how the briar faerie will flourish her wand! You can see one of these flaws on the backside of the bowl in the photo below.
The other pipe is a dublin bamboo. Although I don't really make a lot of dublins, it is one of my favourite standard shapes. As with the volcano, this one will also be blasted. Small pinprick flaws on the back of the bowl and also a couple on the bottom.

June 4, 2013

The windowdressers

As a pipesmoker, through the years you accumulate pipes. You buy, you trade, you get pipes from friends. And eventually you end up with a lot of pipe "memorabilia", if you can call it that.
A small selection of these are pipes that end up on your pipe rack, but won't be smoked. They are for looks, for window dressing.
 The above pipe you often get in curio shops here in South Africa. It is made from African blackwood and this particular one my wife bought me when she was on a business trip in Mozambique. The airway follows that kink in the shank, but I have no idea how this is accomplished. It's never been smoked and I will also not try. But it will stay on the pipe rack.
 This pipe I found in a 2nd hand shop. Pawn-, antique or secondhand shops: I just can't resist the lure. You never know what you'll find, as in this case.
It's a porcelain pipe made in Holland that I got for R20 (about $2). The bowl heats up quickly and the draw is terrible. But it is beautiful to look at, hey?
 This one is Tyrolean. All those fancy bits and pieces of the stem can unscrew. The windcap is a bit skew and the stummel even sports some stars! As with the Dutch pipe, it smokes horrible, but it does have some sort of pipe history to it, so it will stay!
In Lithuanian folklore the devil is quite prominent and they even have a museum dedicated to all sort of devil memorabilia. This pipe was bought by my wife when last she went to visit her parents. The wood it is made from is very soft, one of the many reasons that deter me from smoking it. It has been carved beautifully though and will always have a special place close to the pipe rack.